Employee Information Website
• Logout
- /
- /
- /
How to Add a Zoho Calendar to iOS (iPhone/iPad)
There are 3 options:
1. (The easiest method): Go to your App Store on your phone or tablet and download the app, by Zoho Corp, called Zoho Calendar (here’s the link: https://www.zoho.com/calendar/mobile-apps.html)
2. If you use Google Calendar on your phone and/or computer, please follow this tutorial: Syncing Google Calendar with Zoho Calendar
3. If you’d like to add your Zoho Calendar to the native calendar app on your phone (where you may have other calendars located), you need to follow the instructions below:
Steps to configure CalDAV sync for iPhone and iPad
Before configuring the sync on your iPhone/iPad, go to your Zoho Calendar account and select the calendars to be synced using CalDAV.
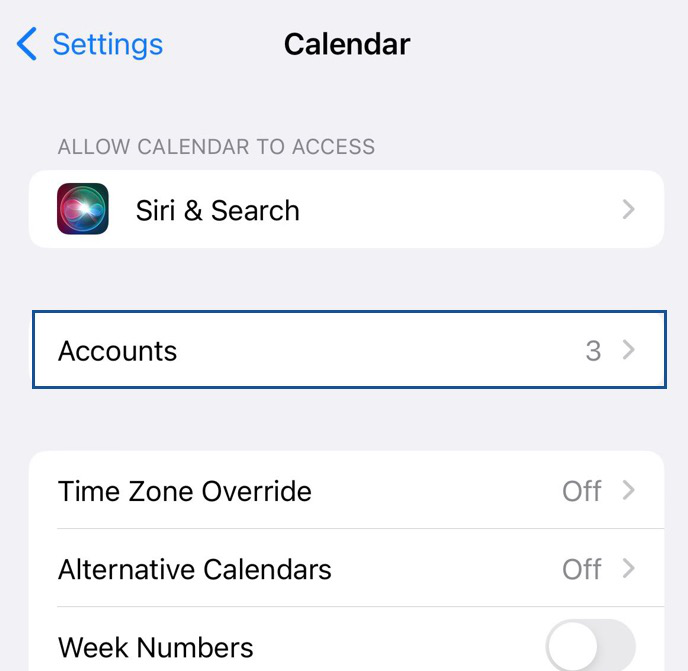
- Navigate to Settings > Calendar >Accounts > Add account.

- Click on the Other option on the Add account page
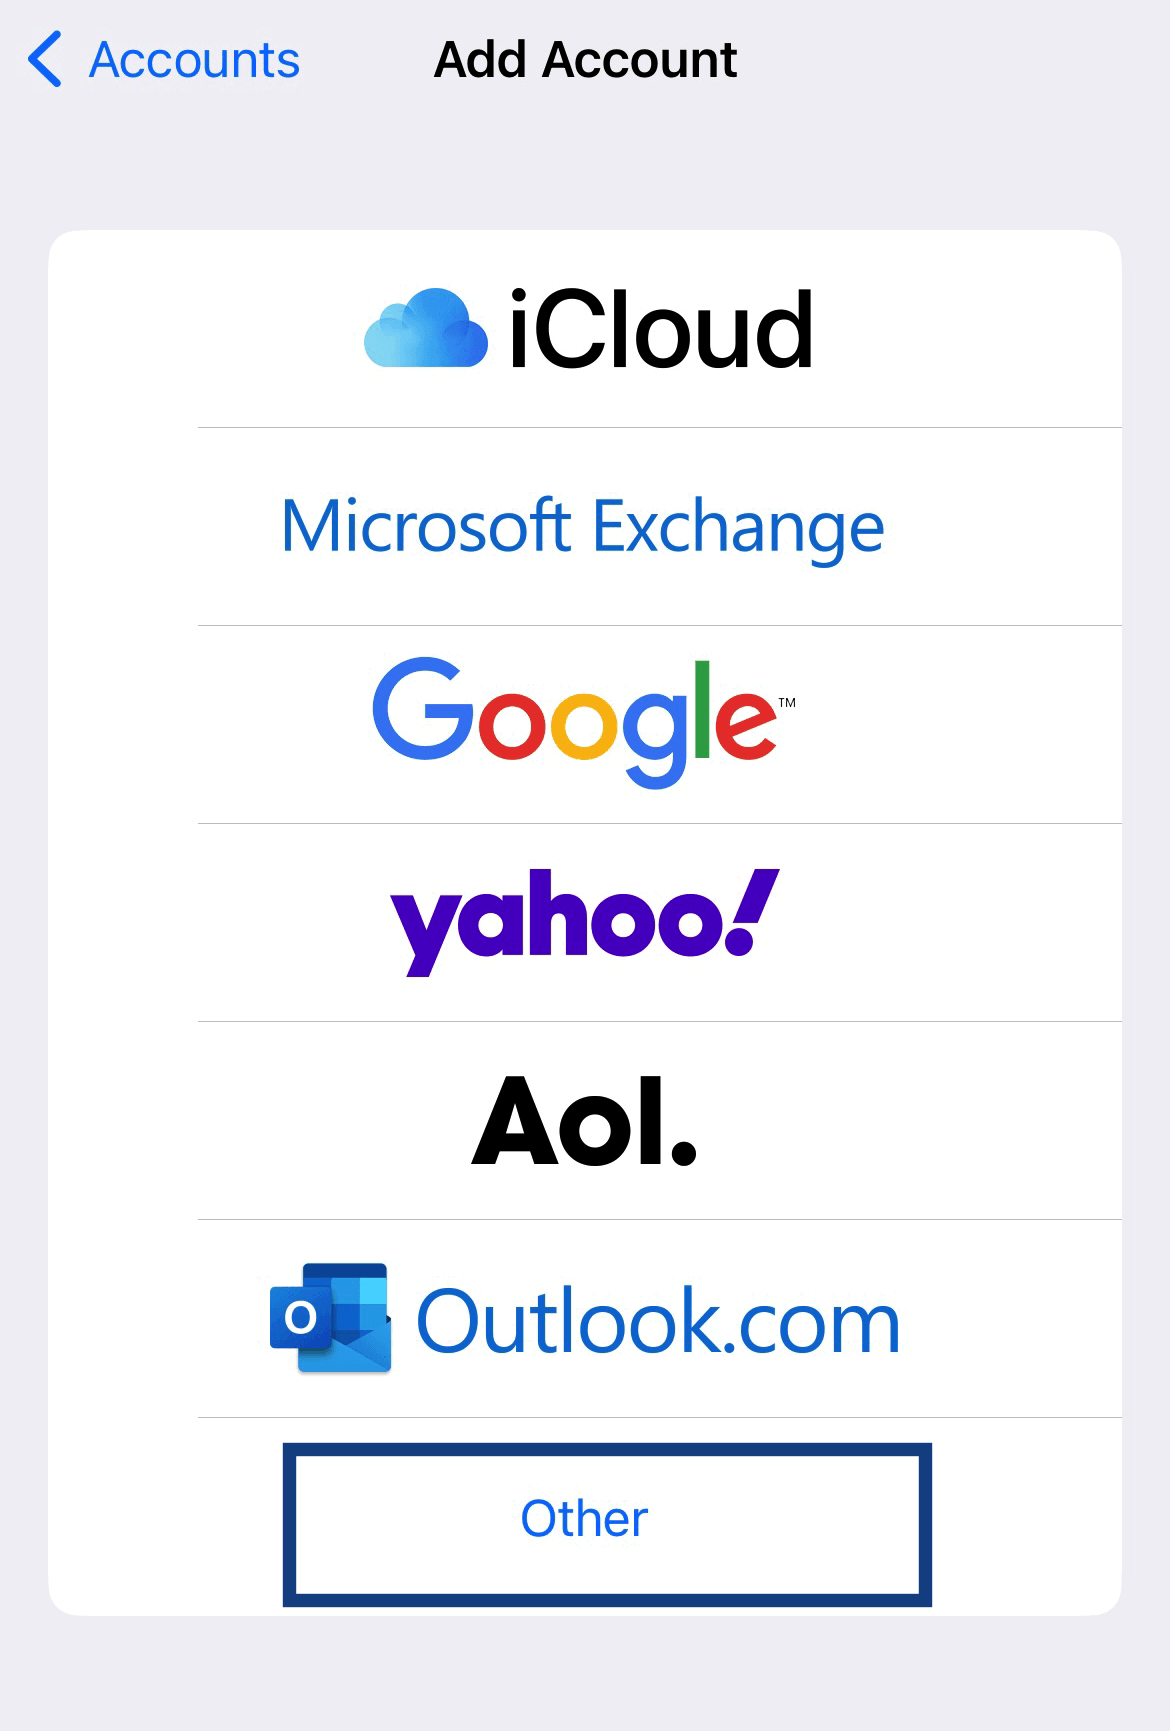
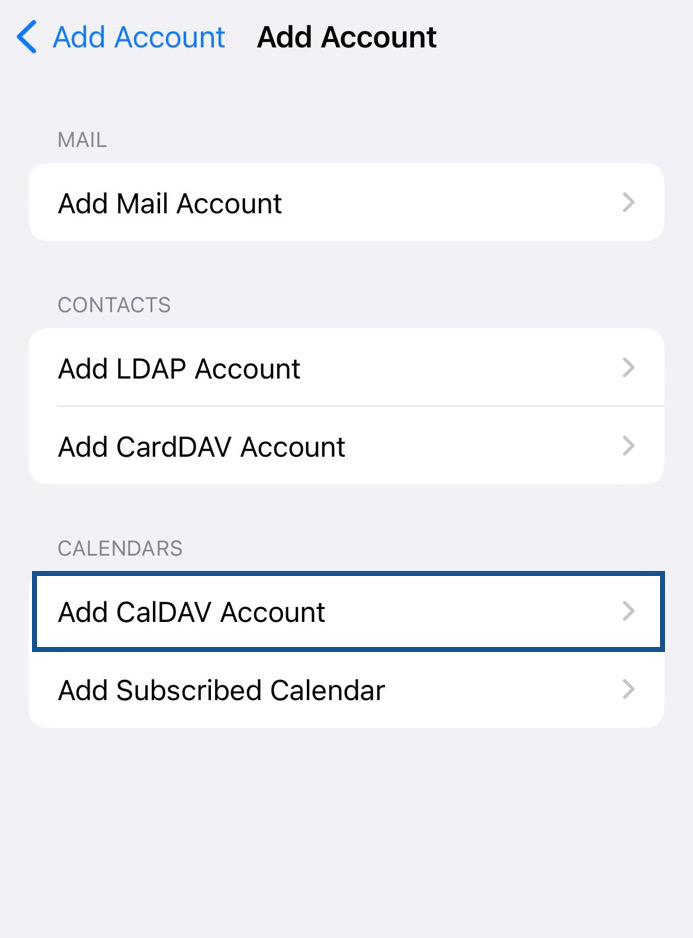
- Select Add CalDAV account to proceed
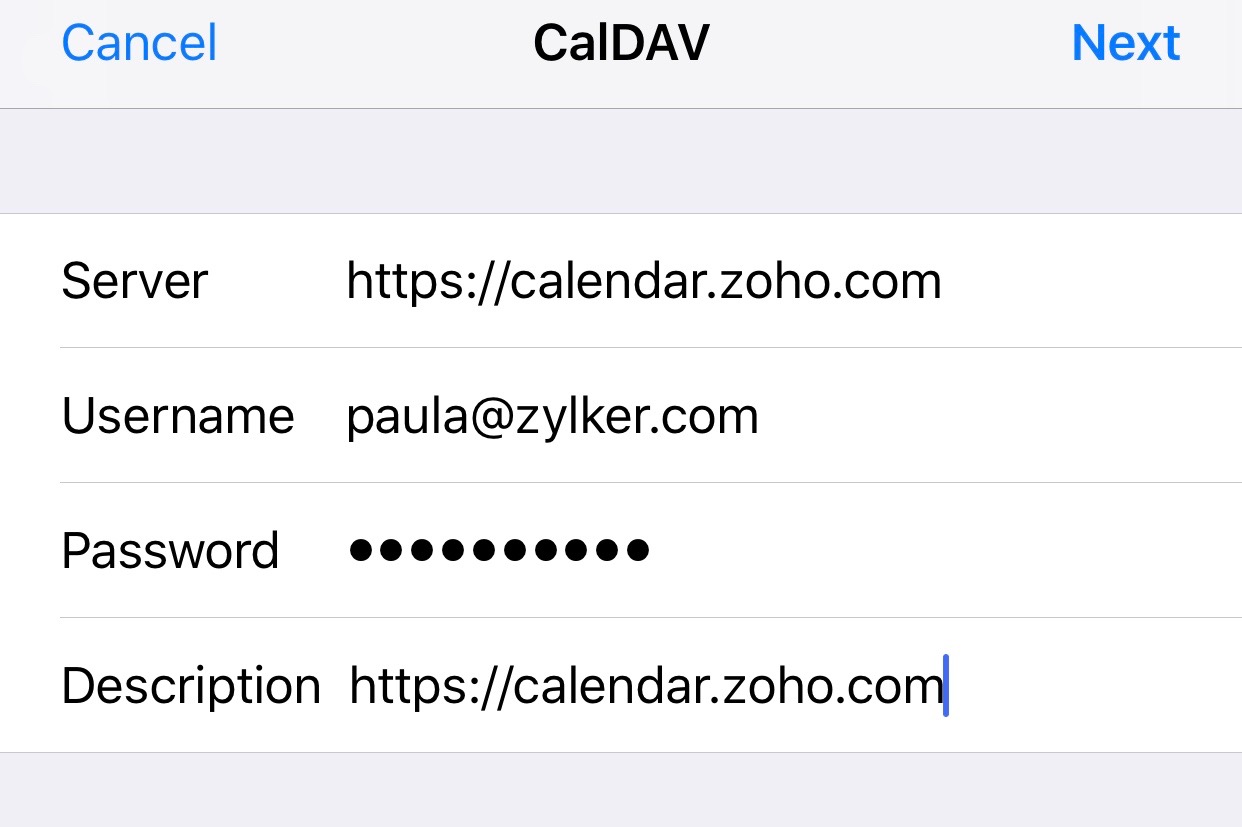
- Enter the server as https://calendar.zoho.com/ (The server address after https:// will vary for different data centers. Refer here.)
- Enter your Zoho account email ID in the Username field and your Password.If you have enabled Two Factor Authentication (TFA), you have to generate an Application Specific Password to proceed.
- Type your choice of Description for this CalDAV account and click Next.
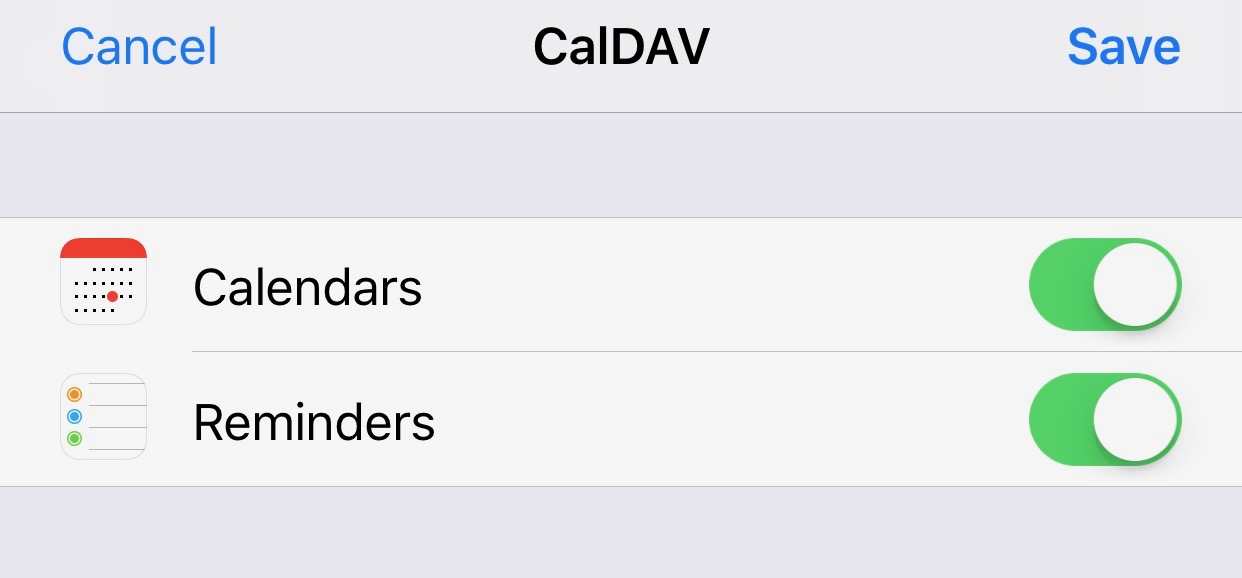
- Turn on/off the notifications for Reminders and click Save.
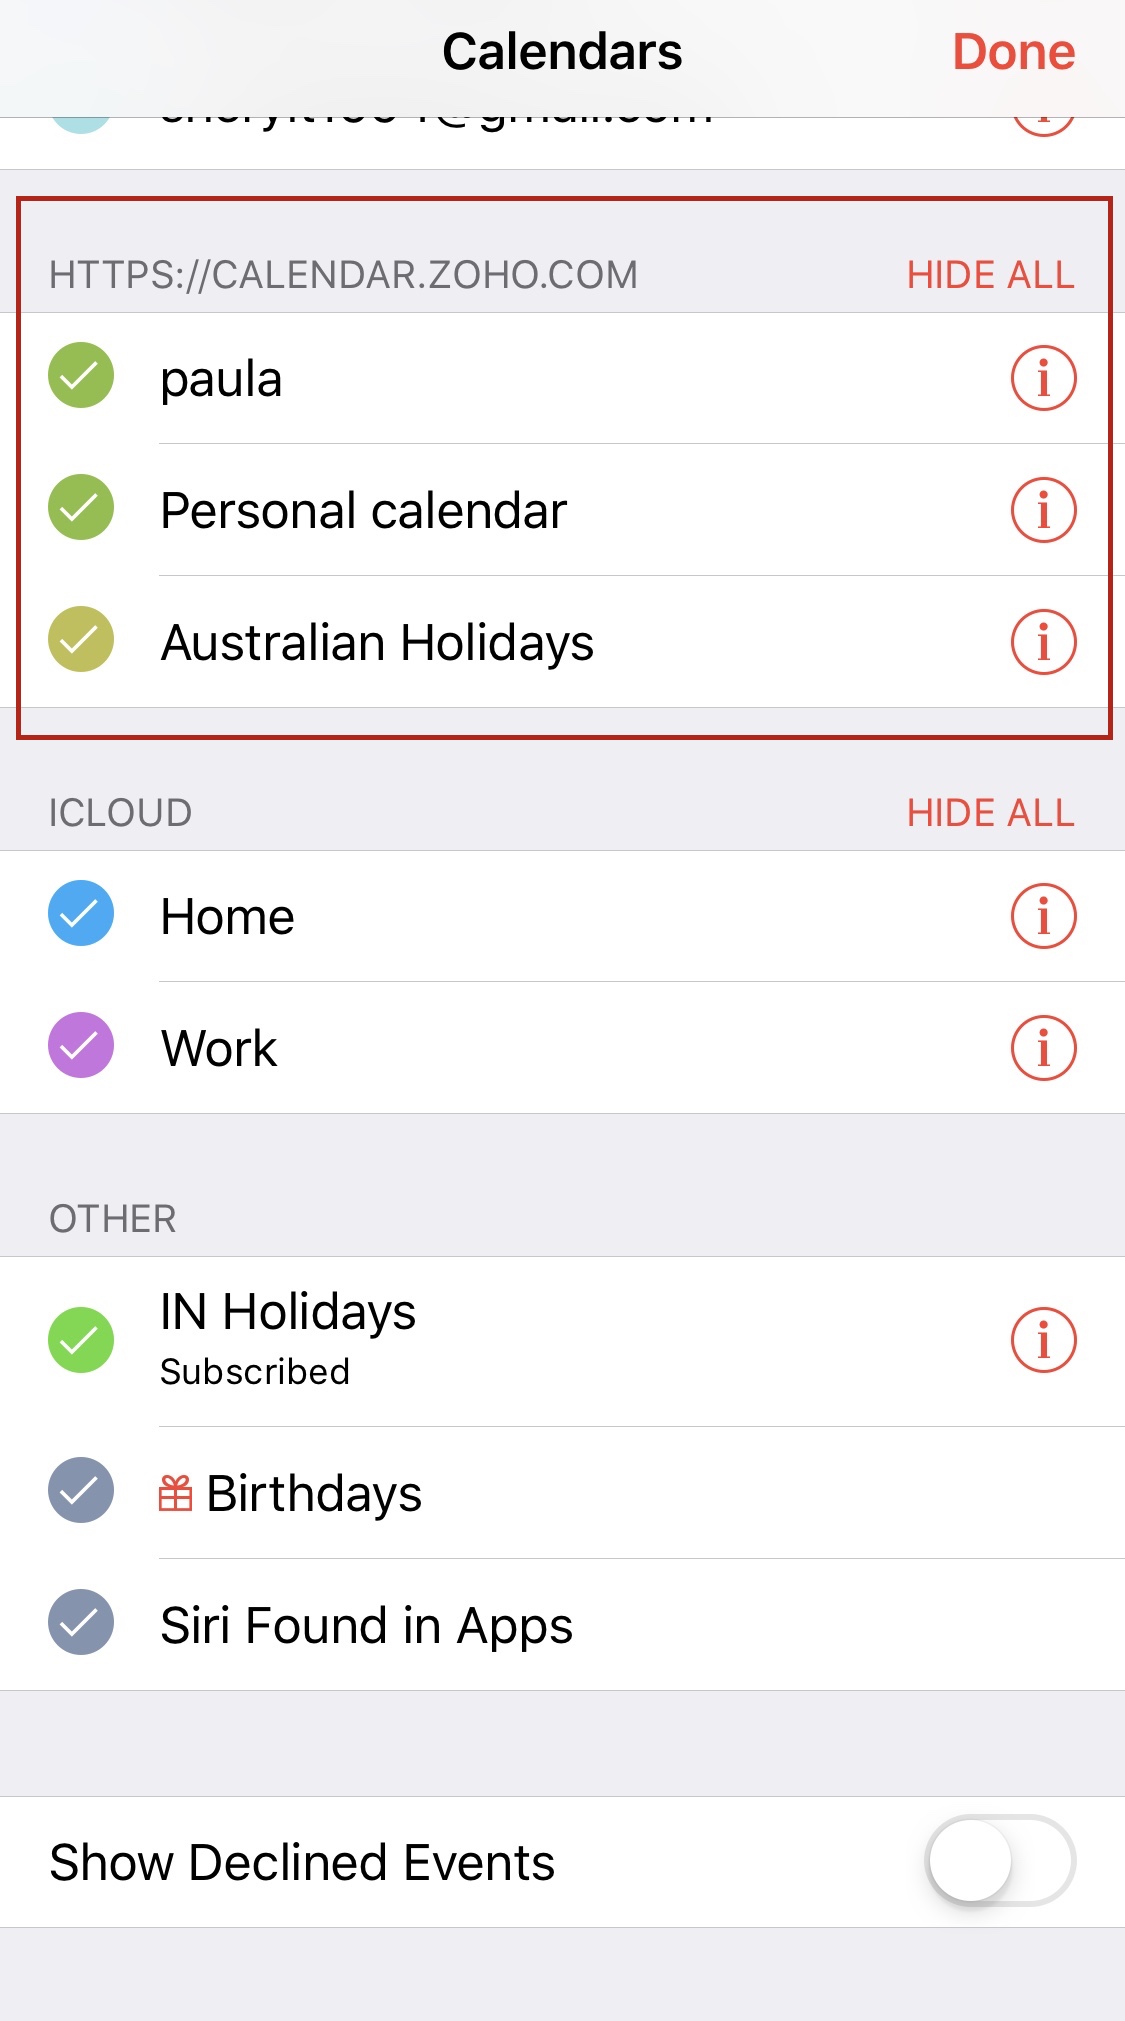
- To check if your CalDAV sync was successful, open the Calendar app on your iPhone/iPad and click on Calendars from the bottom center of the screen.
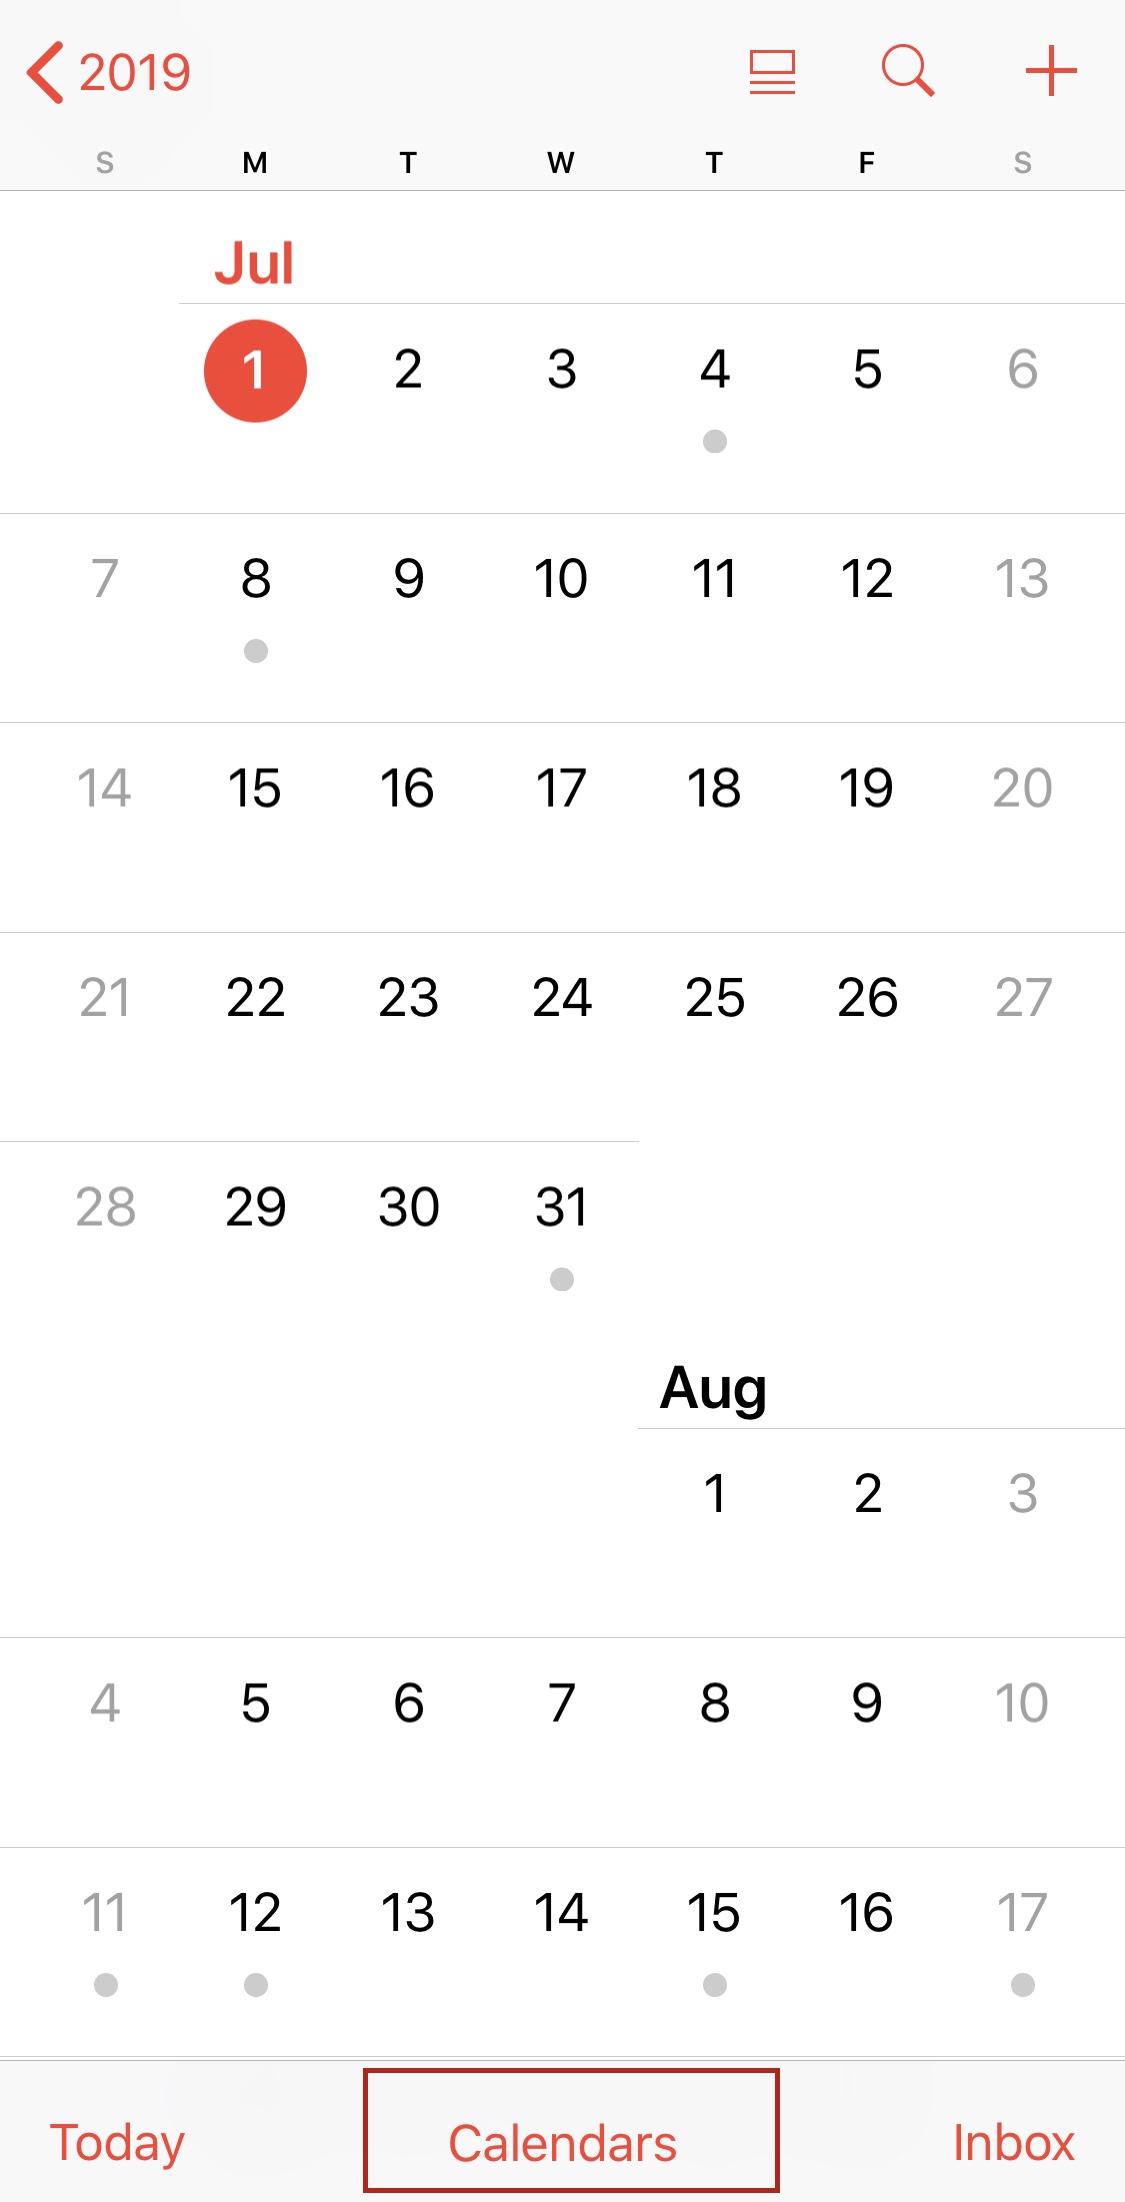
- You will be able to see the list of calendars from your Zoho account that is currently synced with your iPhone/iPad calendar app.
- Go to your Zoho Calendar web version, create an event in a specific calendar, and refresh the page.
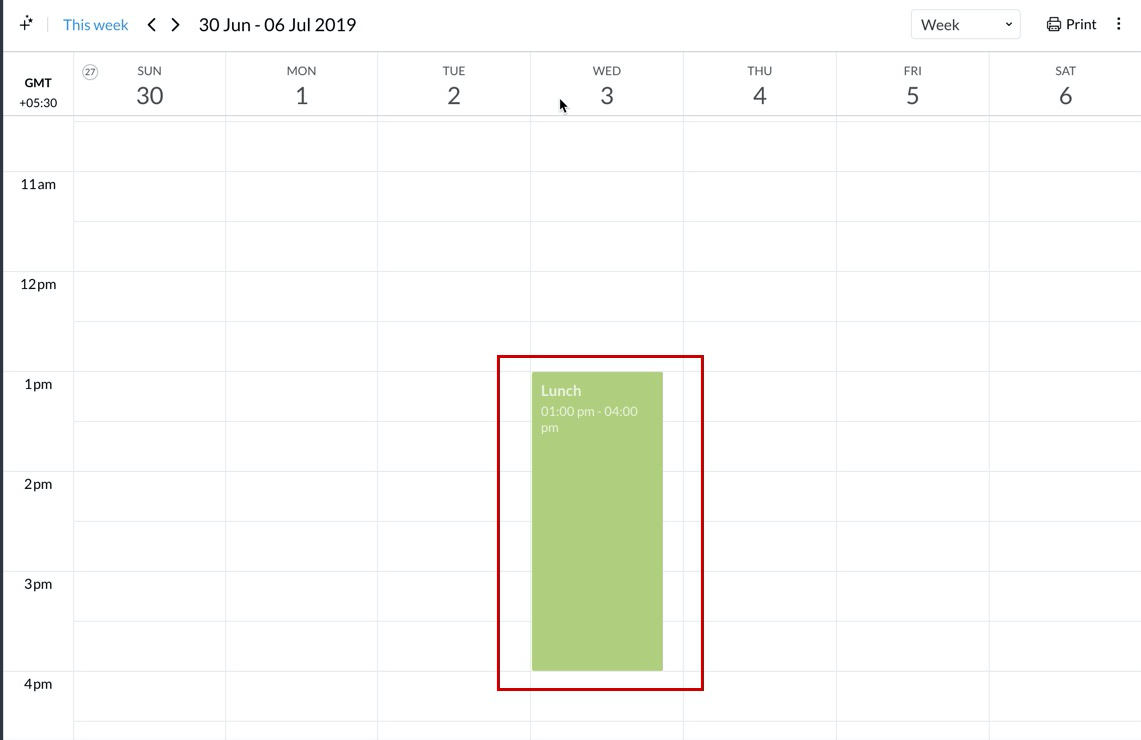
- The recently added event will be synced with your iPhone/iPad calendar app.
- In case you want to delete your CalDAV account, go to Settings > Accounts & Passwords > Accounts, click on the account you want to delete, and press the Delete Account option.
As always, message IT on Cliq, Email, or via the Ticket System with any tech concerns or issues.